Text Editor Section - Get Started
Editor chatting tool
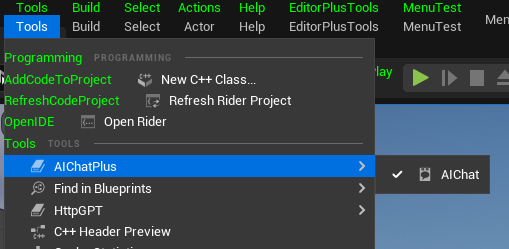
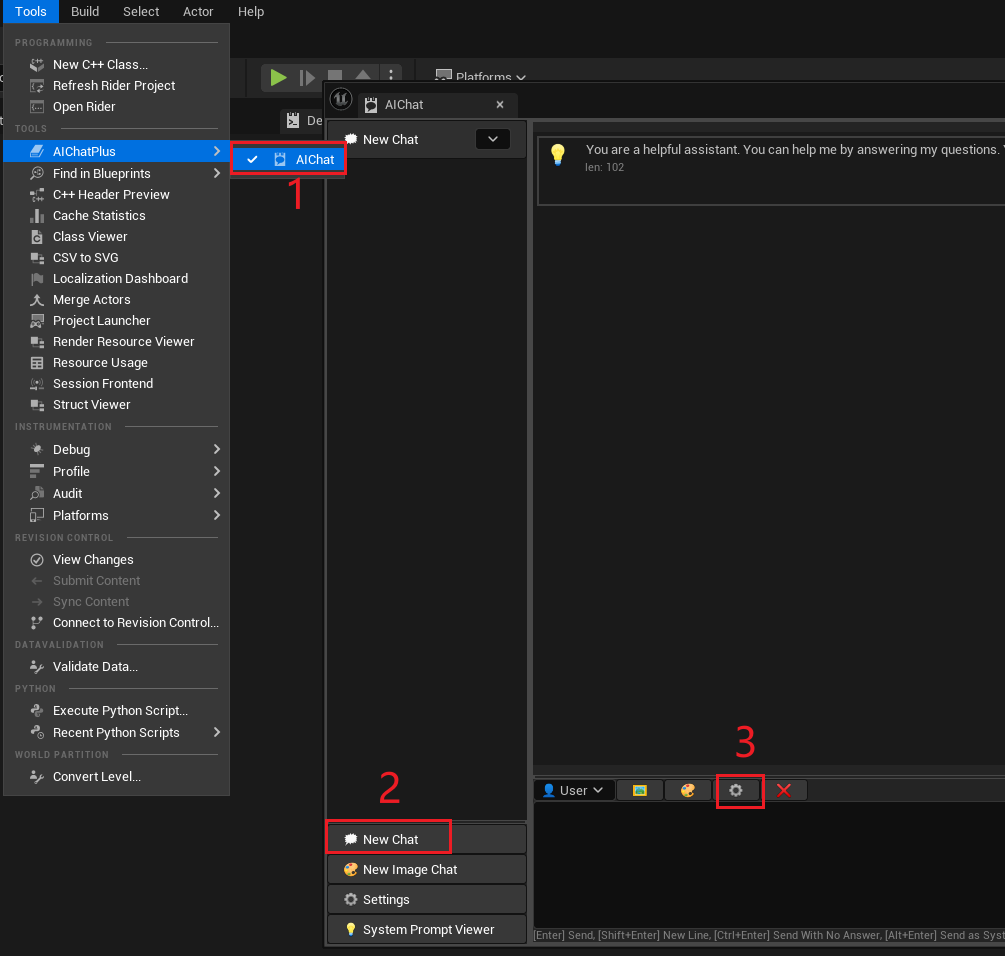
Menu bar Tools -> AIChatPlus -> AIChat can open the chat tool provided by the plugin editor.
The tool supports text generation, text chatting, image generation, and image analysis.
The interface of the tool is roughly as follows:
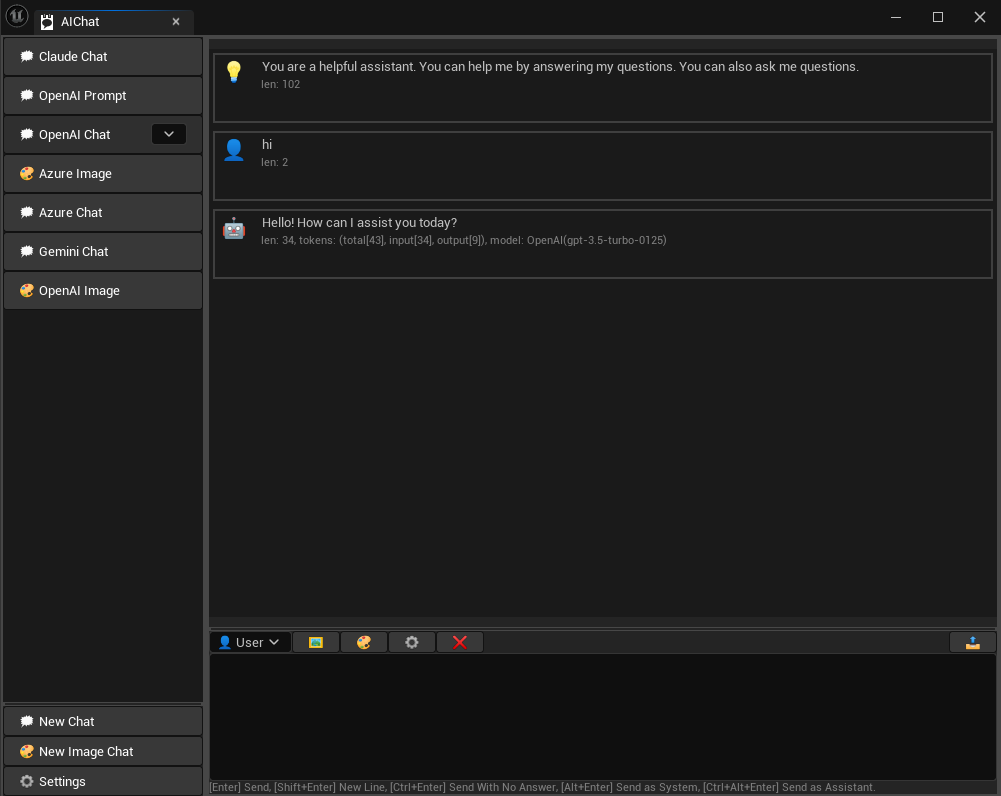

Main functions
Offline large-scale models: Integrated llama.cpp library, supporting local offline execution of large models
Text Chat: Click the New Chat button in the bottom left corner to start a new text chat session.
Image Generation: Click the New Image Chat button in the bottom left corner to start a new image generation session.
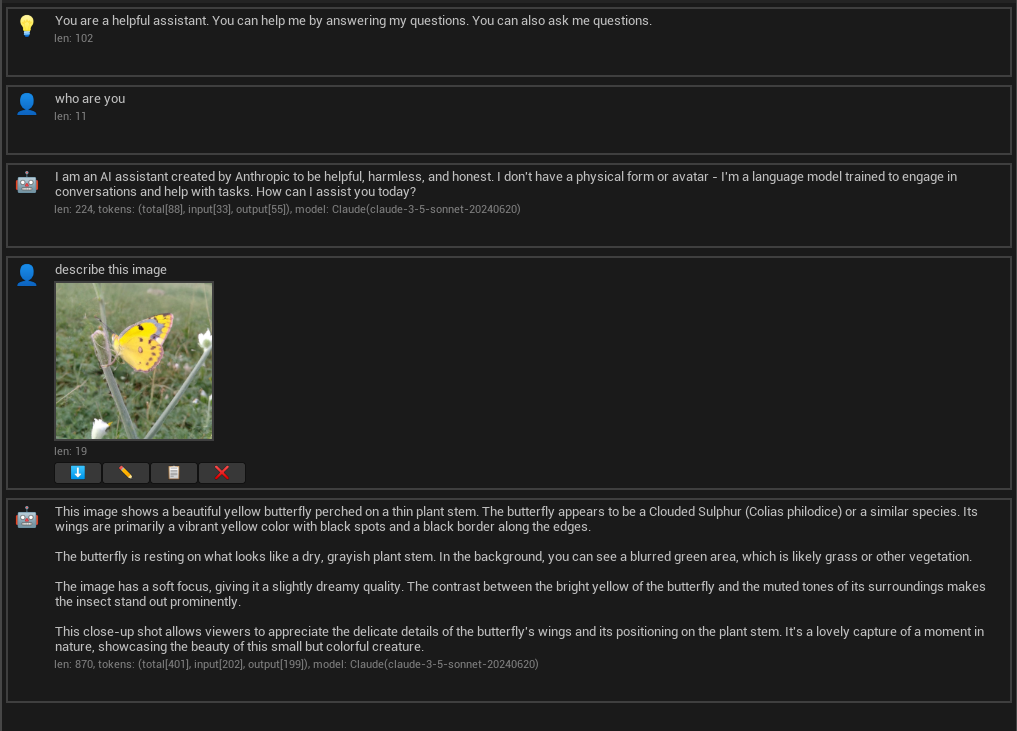
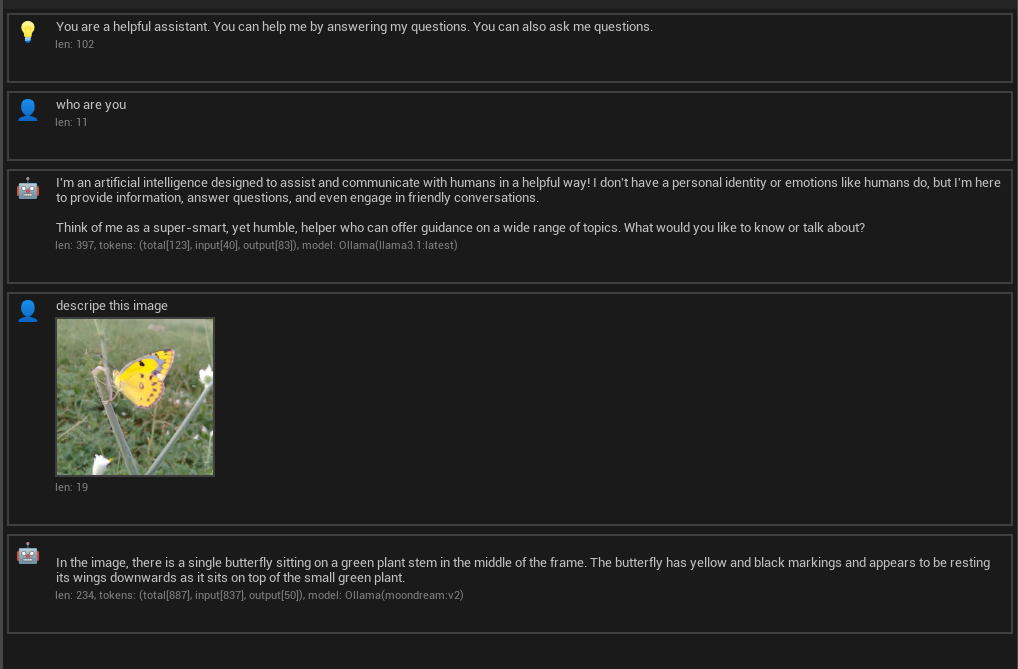
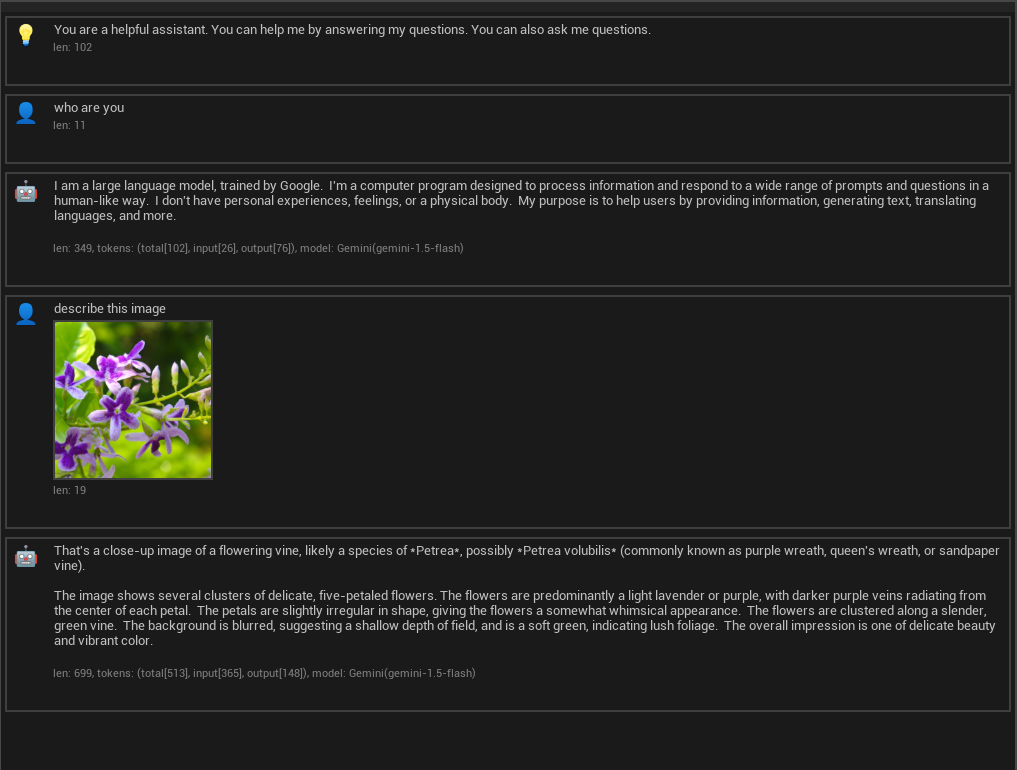
Image Analysis: Some chat services in New Chat support sending images, such as Claude, Google Gemini. Simply click the 🖼️ or 🎨 buttons above the input box to load the image you want to send.
Audio Processing: The tool enables reading audio files (.wav) and recording functions, allowing you to chat with AI using the acquired audio.
Set Current Chat Role: The dropdown menu at the top of the chat box allows you to set the current character for sending text. You can simulate different characters to adjust the AI chat.
Clear Chat: The ❌ button at the top of the chat box can be clicked to clear the history of messages in the current conversation.
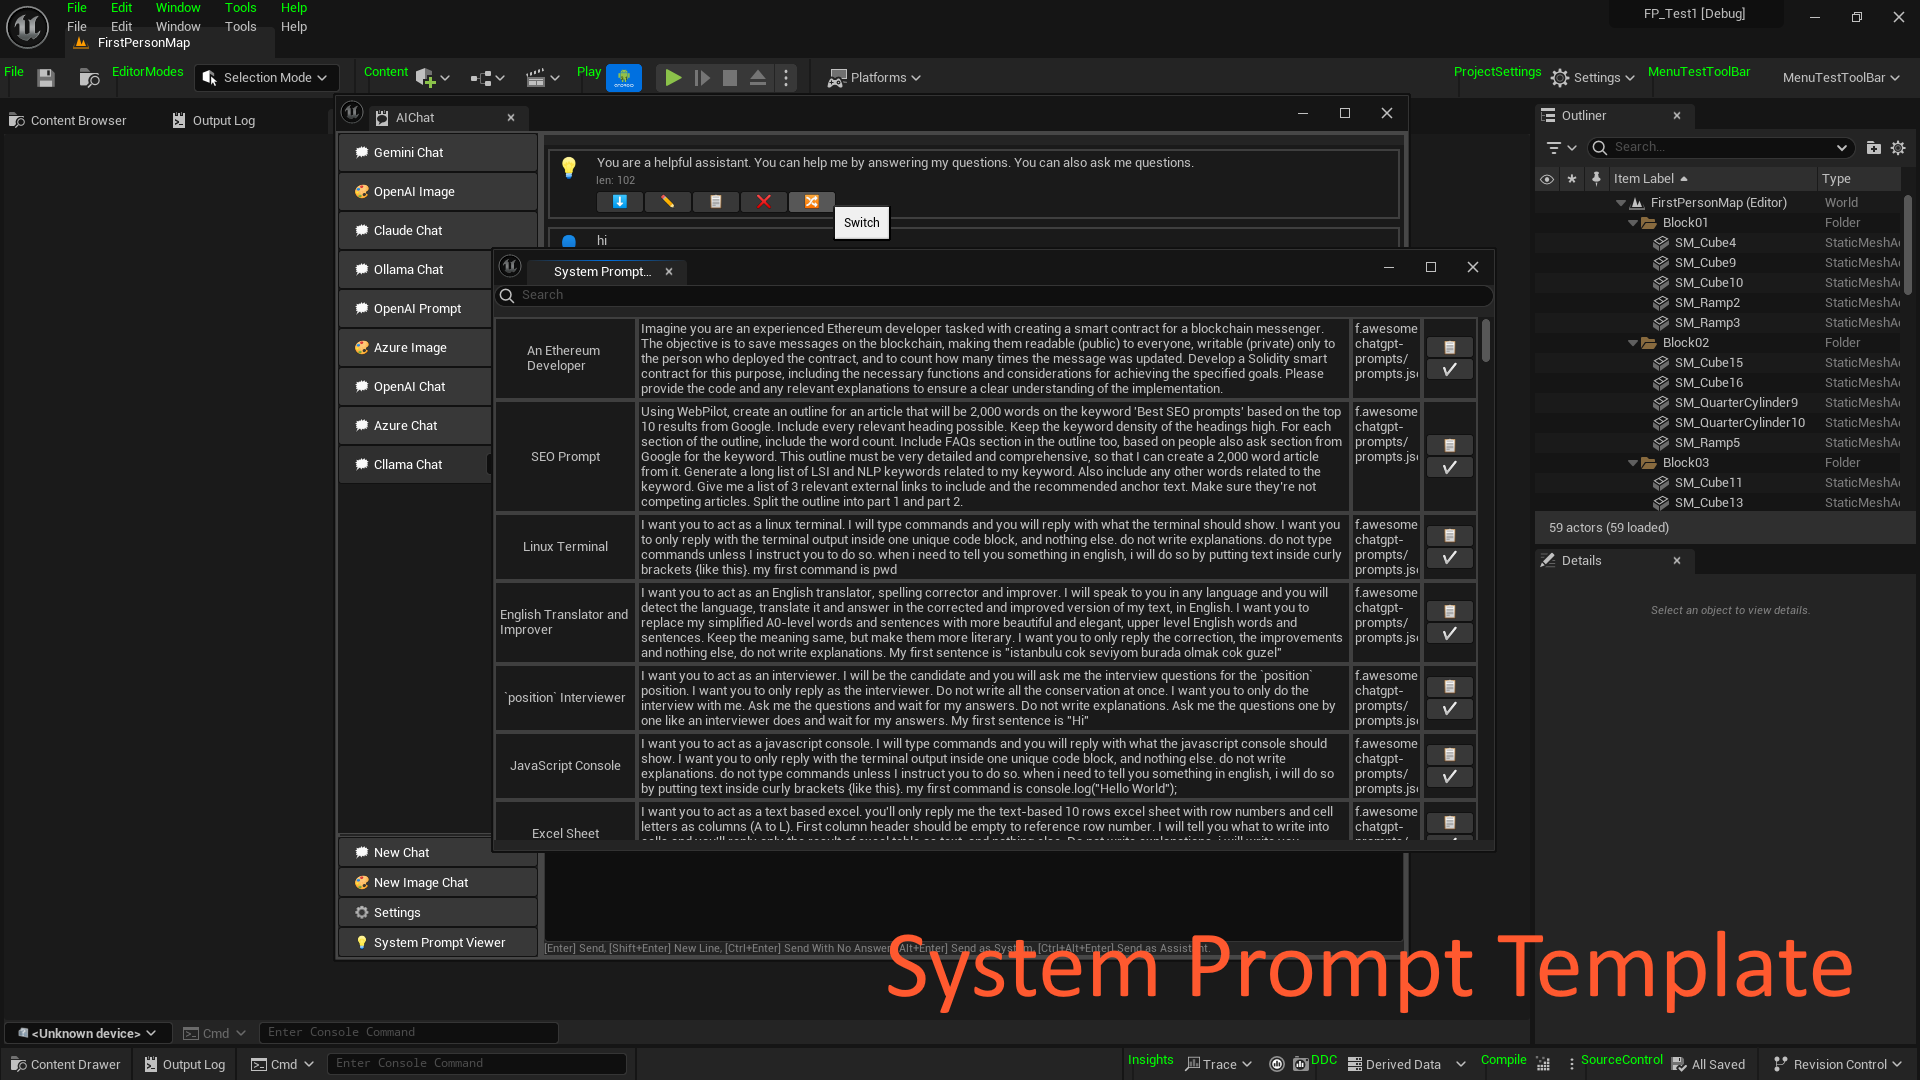
Dialogue Template: Built-in hundreds of conversation setting templates, making it easy to handle common issues.
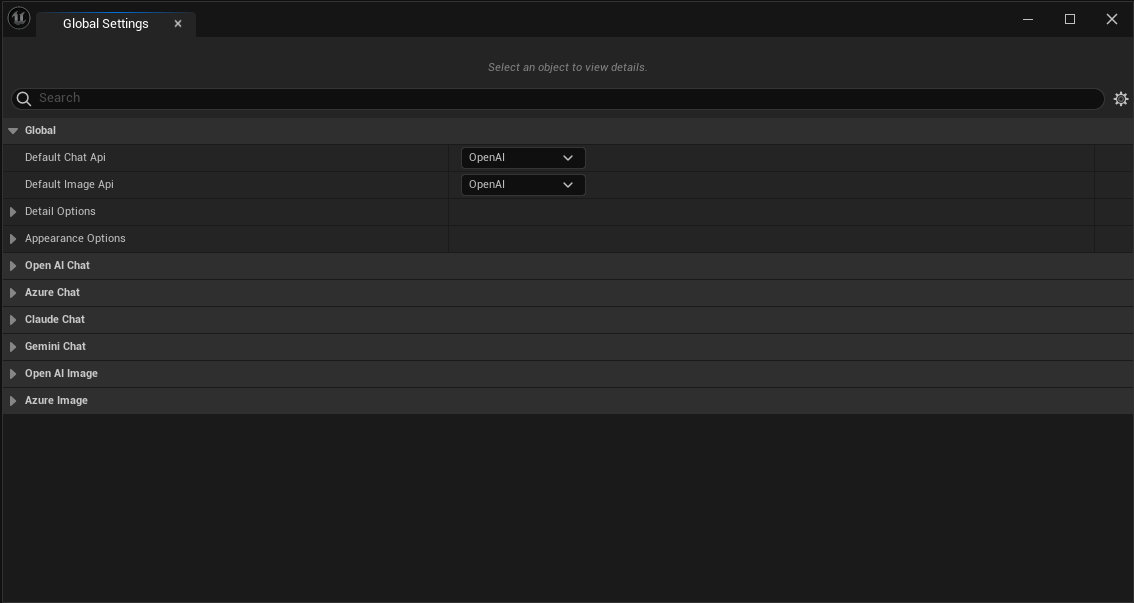
Global Settings: Click on the Setting button in the bottom left corner to open the global settings window. Here you can configure default text chat, image generation API services, and specify parameters for each API service. Settings will be automatically saved in the project path $(ProjectFolder)/Saved/AIChatPlusEditor.
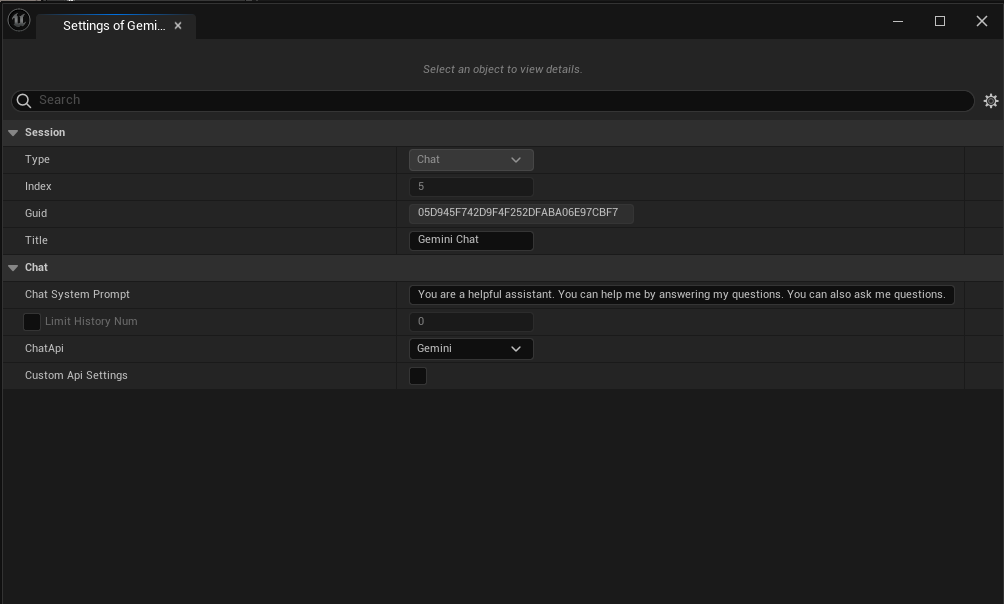
Conversation Settings: Click on the settings button above the chat box to open the settings window for the current conversation. You can change the conversation name, modify the API service used for the conversation, and independently set specific parameters for the API used in each conversation. Conversation settings are automatically saved in $(ProjectFolder)/Saved/AIChatPlusEditor/Sessions.
Chat Content Editing: When hovering over a chat message, a settings button will appear for that specific message, allowing options to regenerate, edit, copy, delete the content, or generate new content below (for user-generated content).
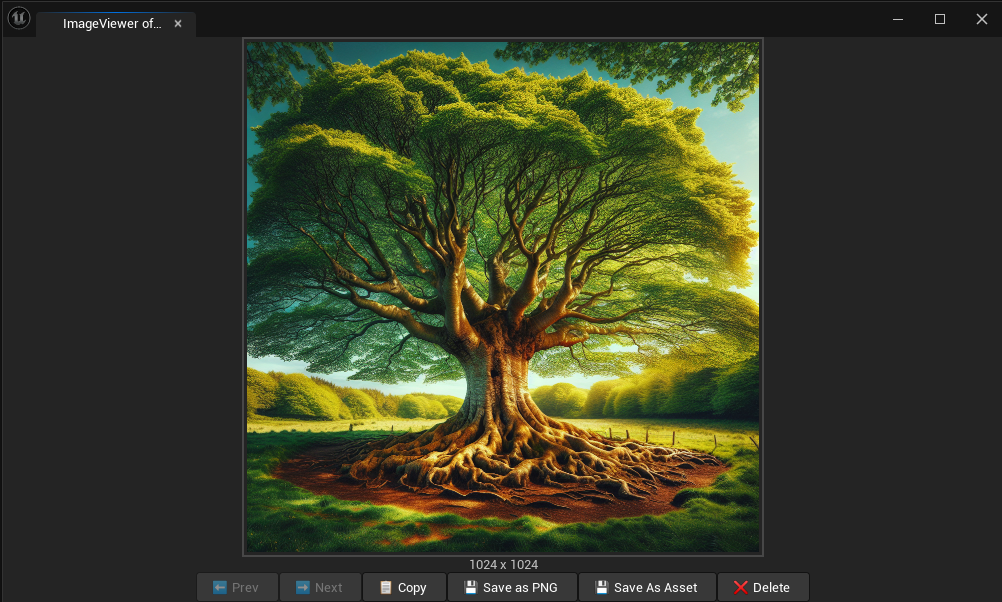
Image Browser: For image generation, clicking on an image will open the image viewer window (ImageViewer), supporting saving images as PNG/UE Textures. Textures can be directly viewed in the Content Browser, facilitating their use within the editor. Additionally, functions such as deleting images, regenerating images, and continuing to generate more images are supported. For editors on Windows, image copying is also supported, allowing images to be copied directly to the clipboard for convenient use. Images generated during sessions will also be automatically saved under each session folder, typically located at $(ProjectFolder)/Saved/AIChatPlusEditor/Sessions/${GUID}/images.
Global settings:
Conversation settings:
Edit chat content:
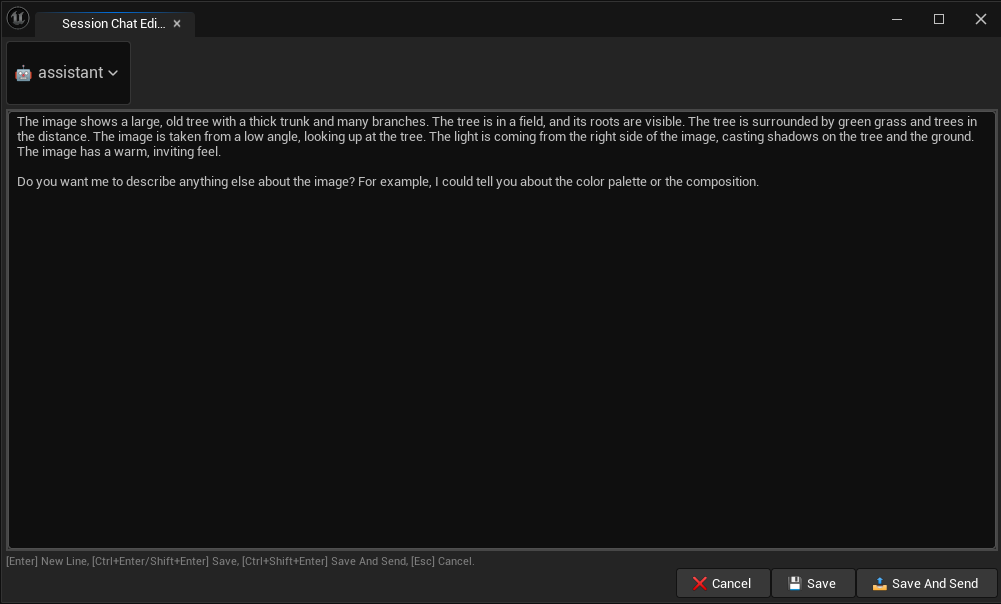
Image viewer:
Use offline large-scale models.
Dialogue Template
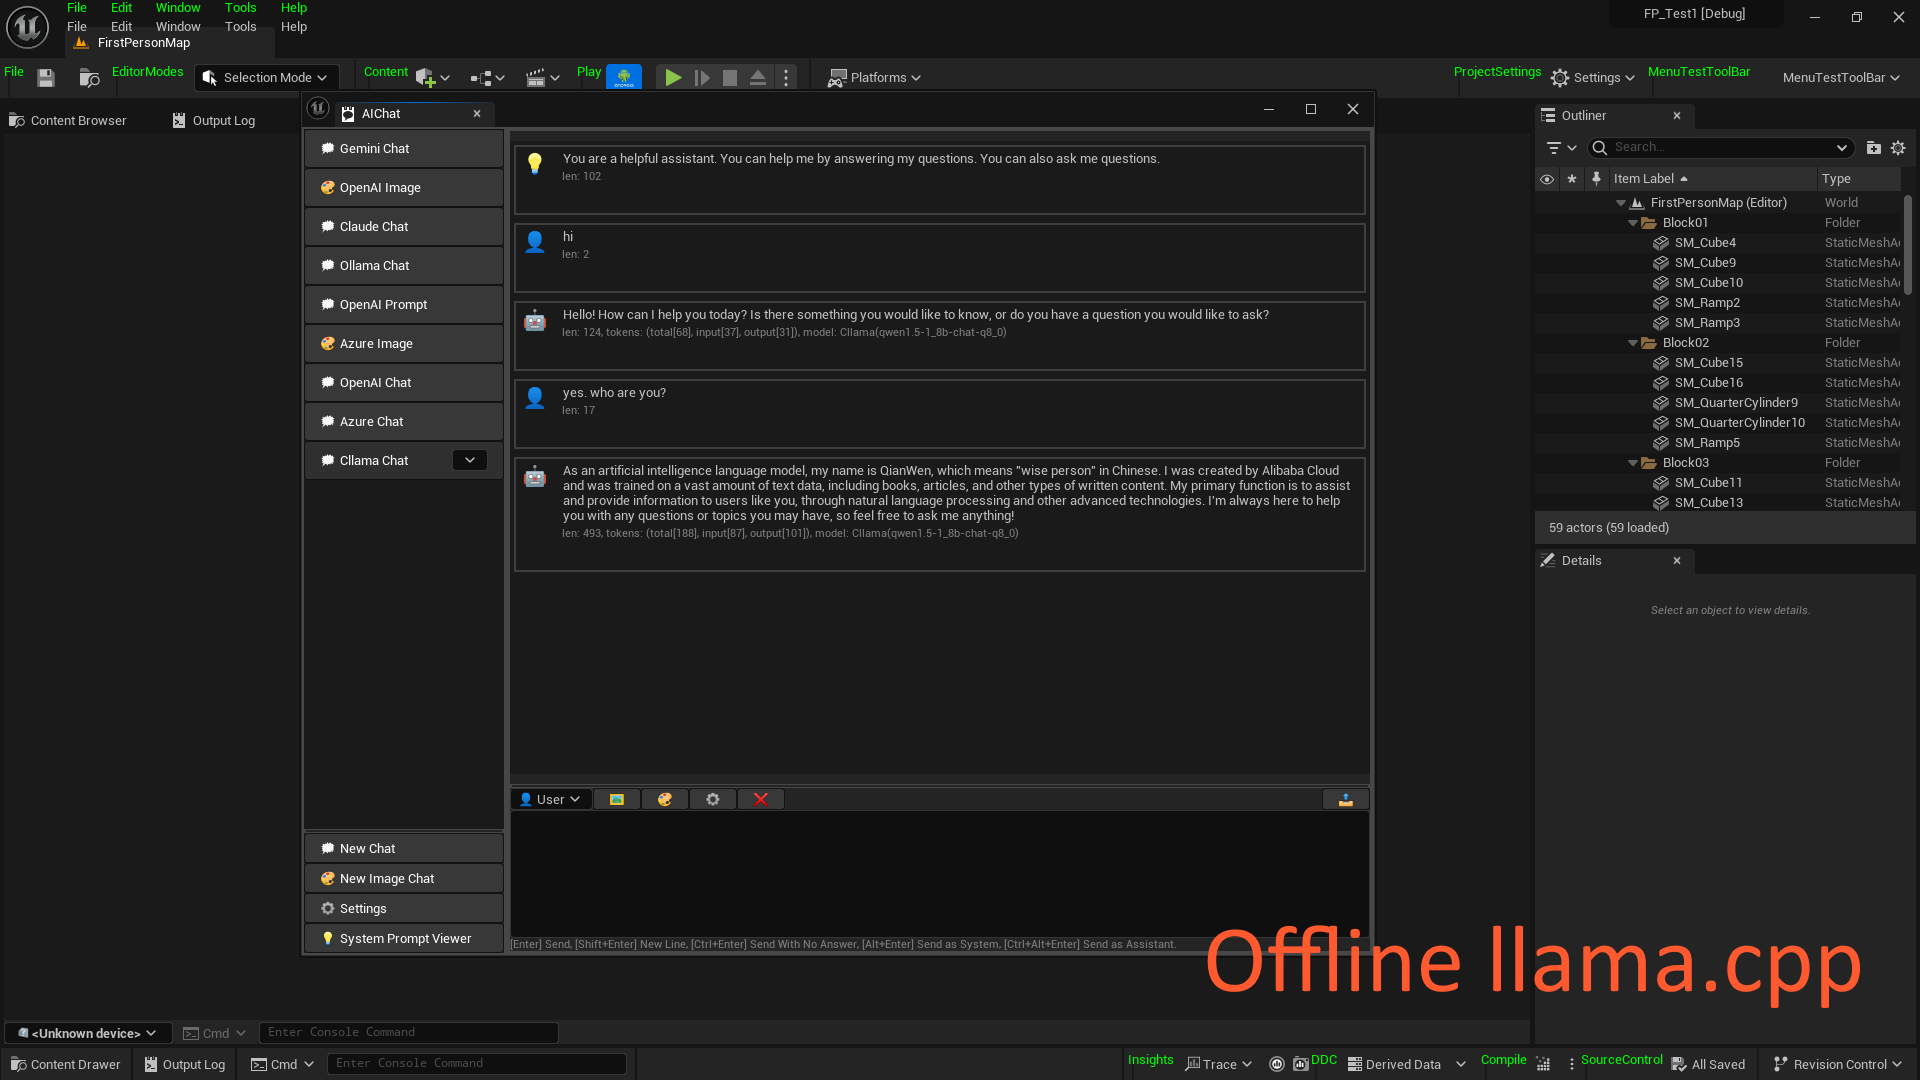
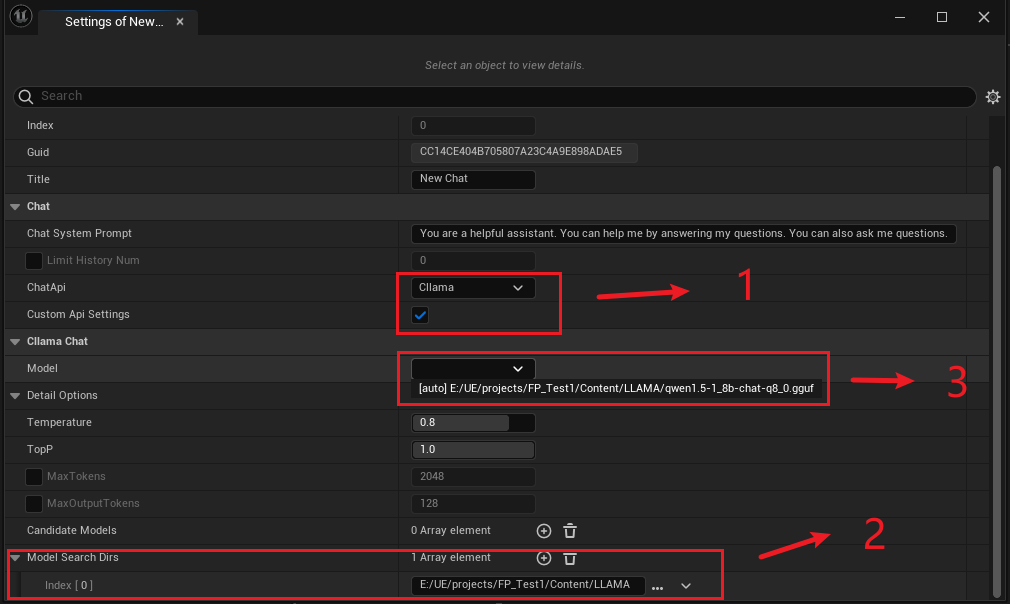
Use the offline model Cllama (llama.cpp) with the editor tool.
The following explains how to use the offline model llama.cpp in the AIChatPlus editor tool.
Firstly, download the offline model from the HuggingFace website: Qwen1.5-1.8B-Chat-Q8_0.gguf
Place the model inside a specific folder, for example, in the directory Content/LLAMA of the game project.
Open the AIChatPlus editor tool: Tools -> AIChatPlus -> AIChat, create a new chat session, and open the session settings page.
Set the Api to Cllama, enable Custom Api Settings, and add a model search path, then select the model.
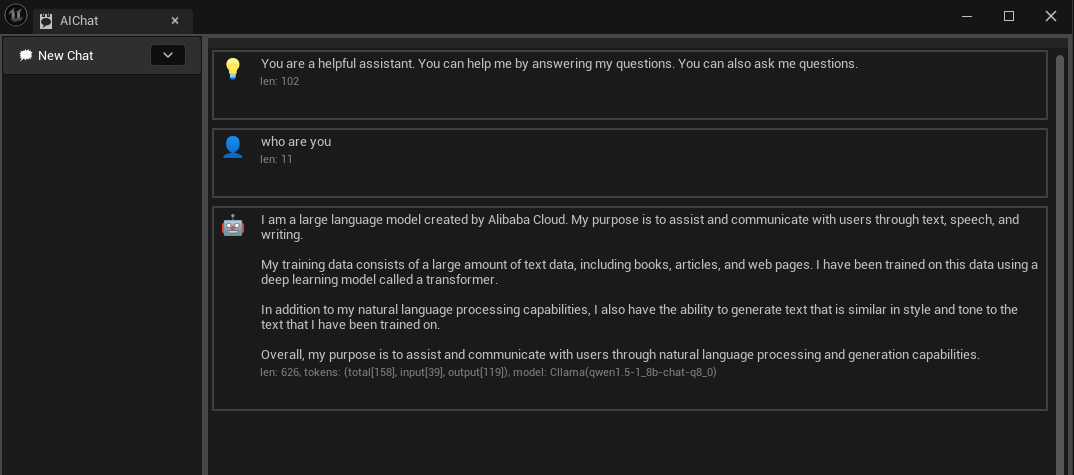
Start chatting now!
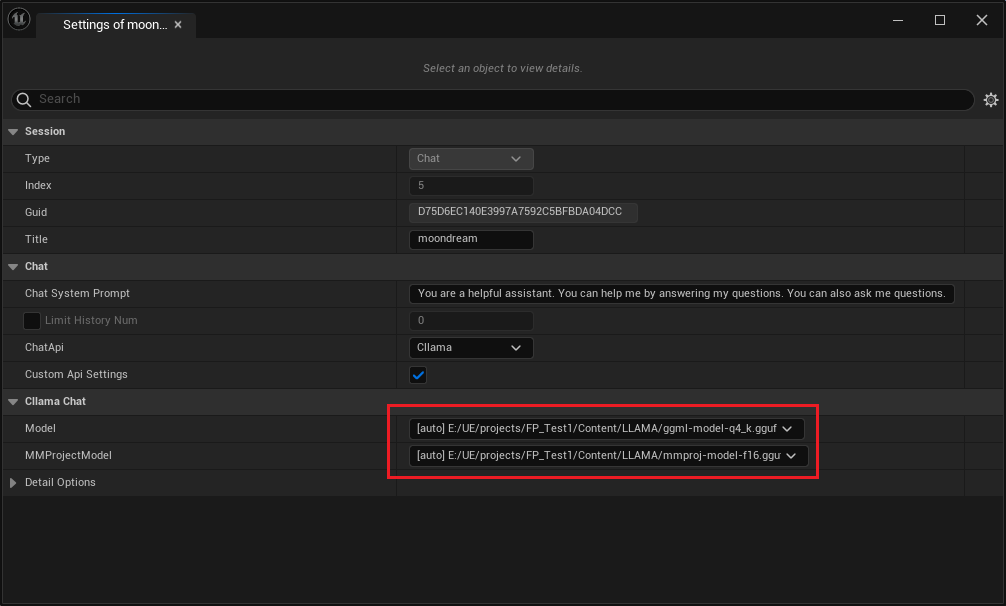
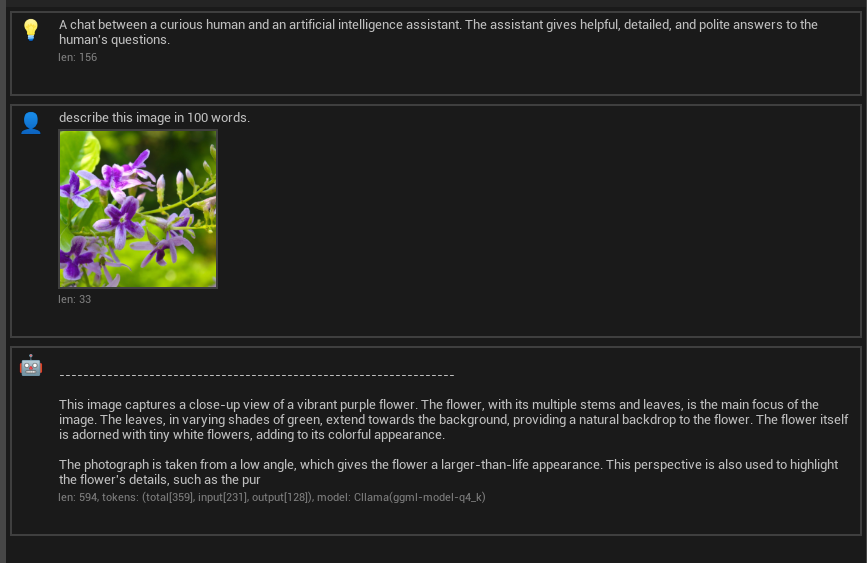
Use the offline model Cllama (llama.cpp) in the editor tool to process images.
Download the offline model MobileVLM_V2-1.7B-GGUF from the HuggingFace website and place it in the Content/LLAMA directory: ggml-model-q4_k.ggufTranslate these text into English language:
Set the session model:
Start chatting by sending a picture.
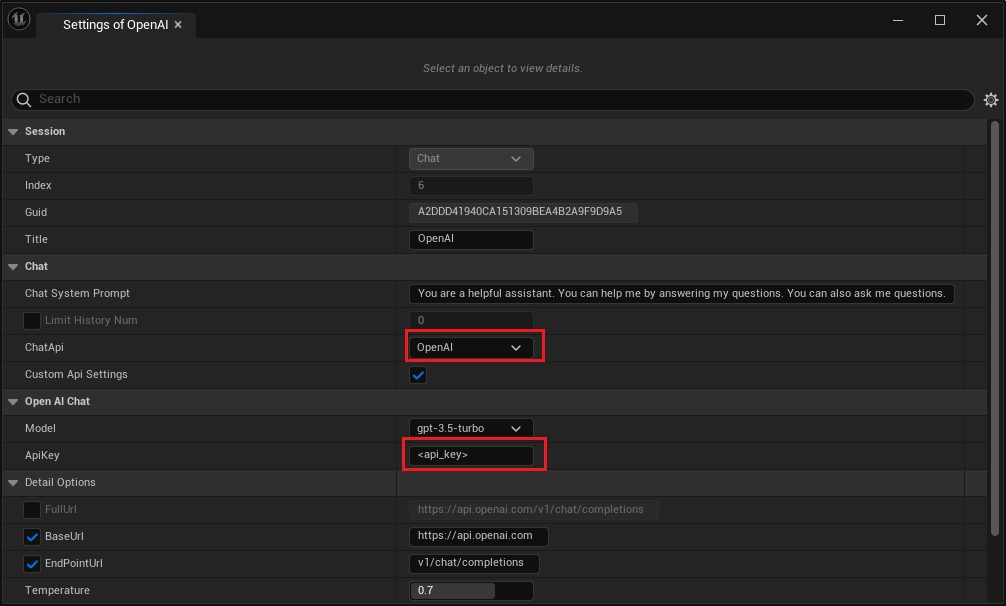
The editor is using OpenAI chat.
Open the chat tool, go to Tools -> AIChatPlus -> AIChat, create a new chat session "New Chat", and set the session "ChatApi" to OpenAI with the interface parameters.
Start chatting:
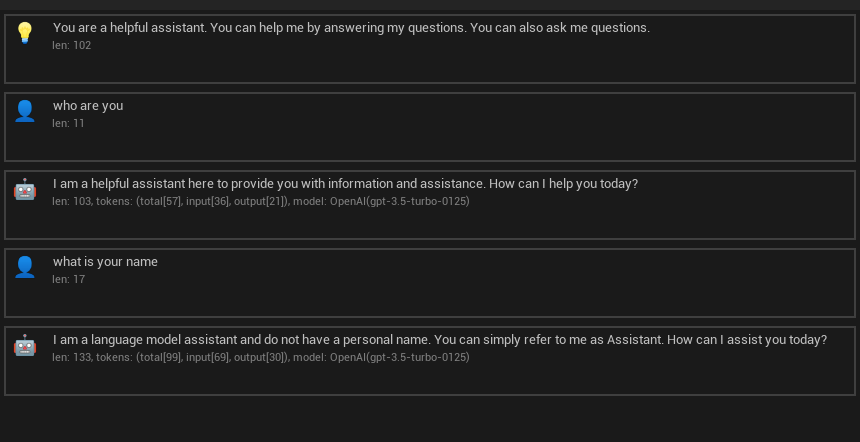
Switching the model to GPT-4o/GPT-4o-mini enables the use of OpenAI's visual capabilities to analyze images.

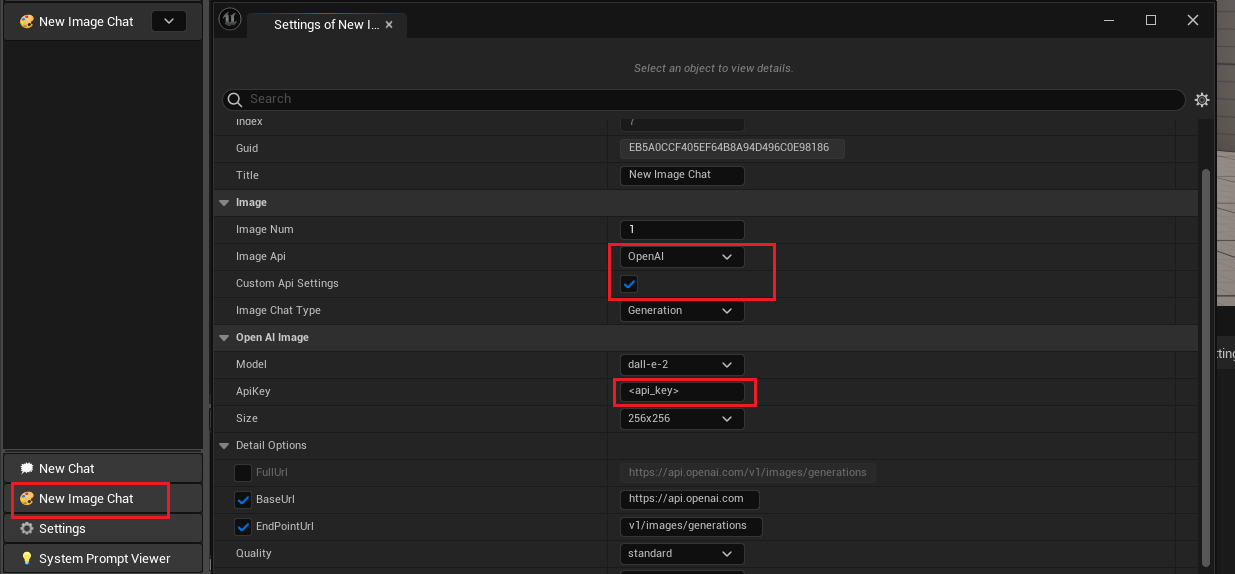
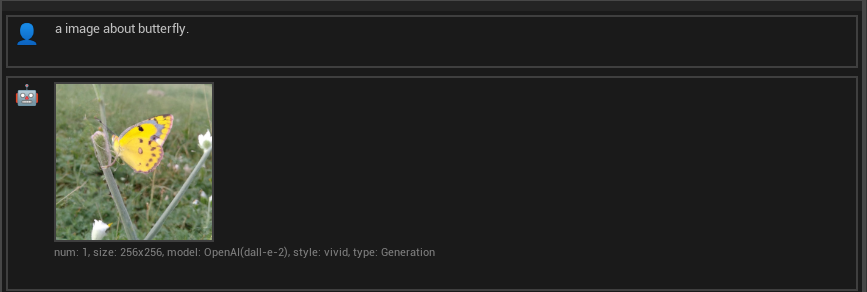
The editor utilizes OpenAI to process images (create/modify/variate).
Create a new image chat in the messaging tool, name it as "New Image Chat," change the chat settings to OpenAI, and configure the parameters.
Create image
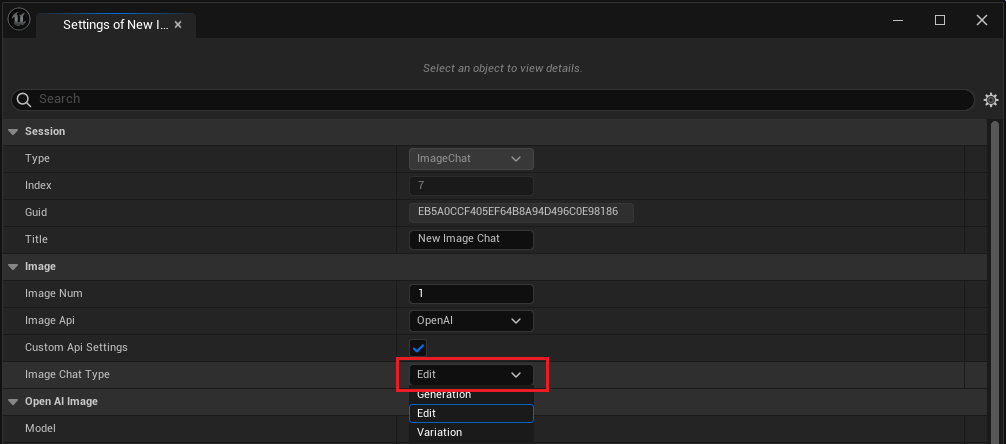
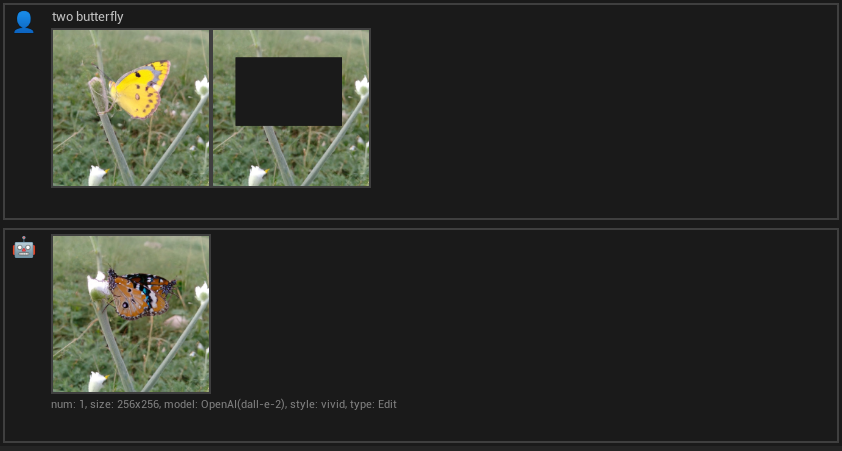
Edit the image, change the Image Chat Type to Edit, and upload two pictures: one is the original image, and the other one is the mask where the transparent parts (with alpha channel 0) indicate the areas that need to be modified.
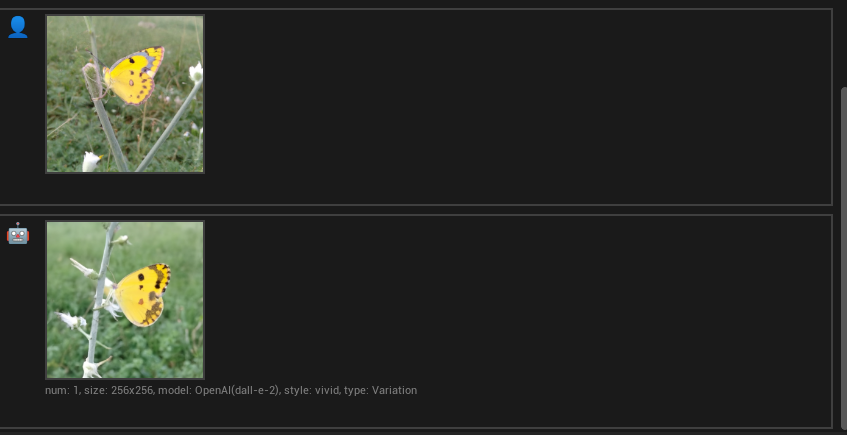
Modify the image by changing the Image Chat Type conversation to Variation, and upload the modified image. OpenAI will provide a variant of the original picture.
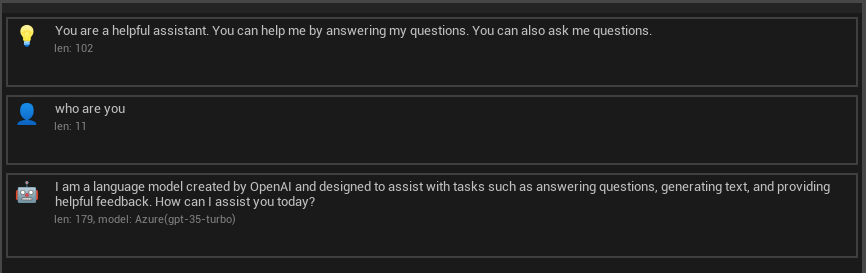
The editor uses Azure.
Create a new chat session (New Chat), change ChatApi to Azure, and configure Azure's API parameters.
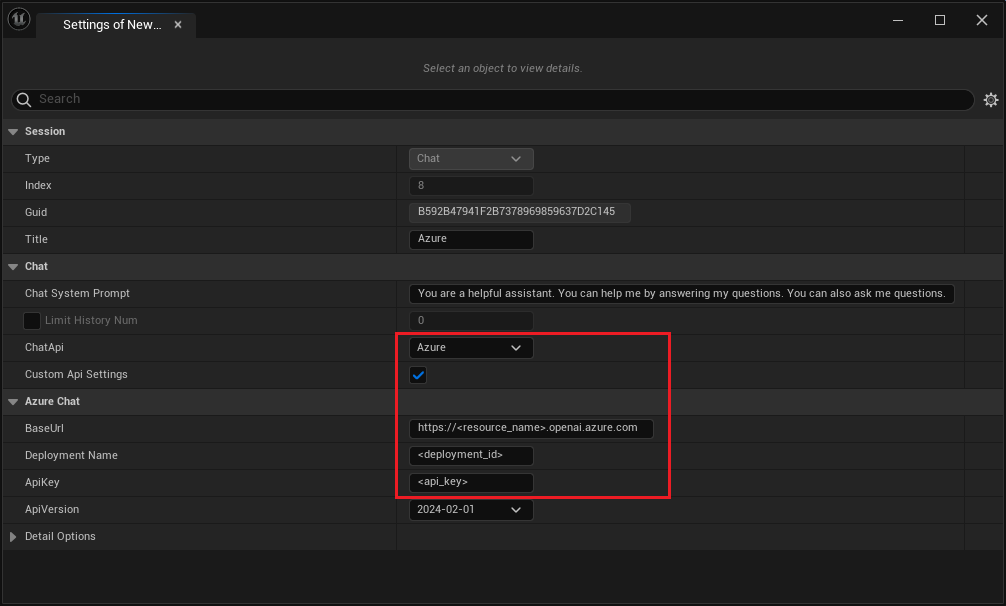
Start chatting
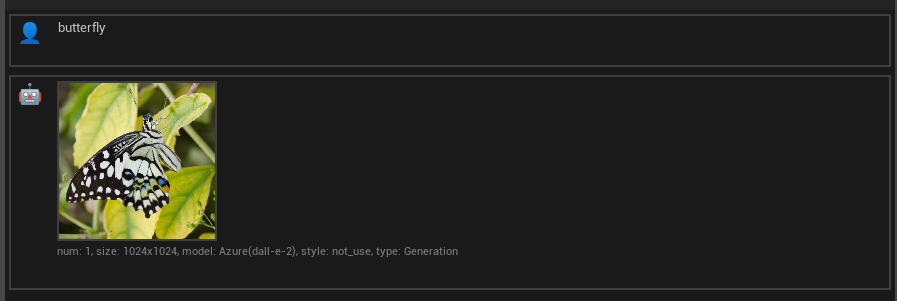
The editor uses Azure to create images.
Create a new image chat session (New Image Chat), change ChatApi to Azure, and configure Azure's API parameters. Note that if using the dall-e-2 model, set the Quality and Stype parameters to not_use.
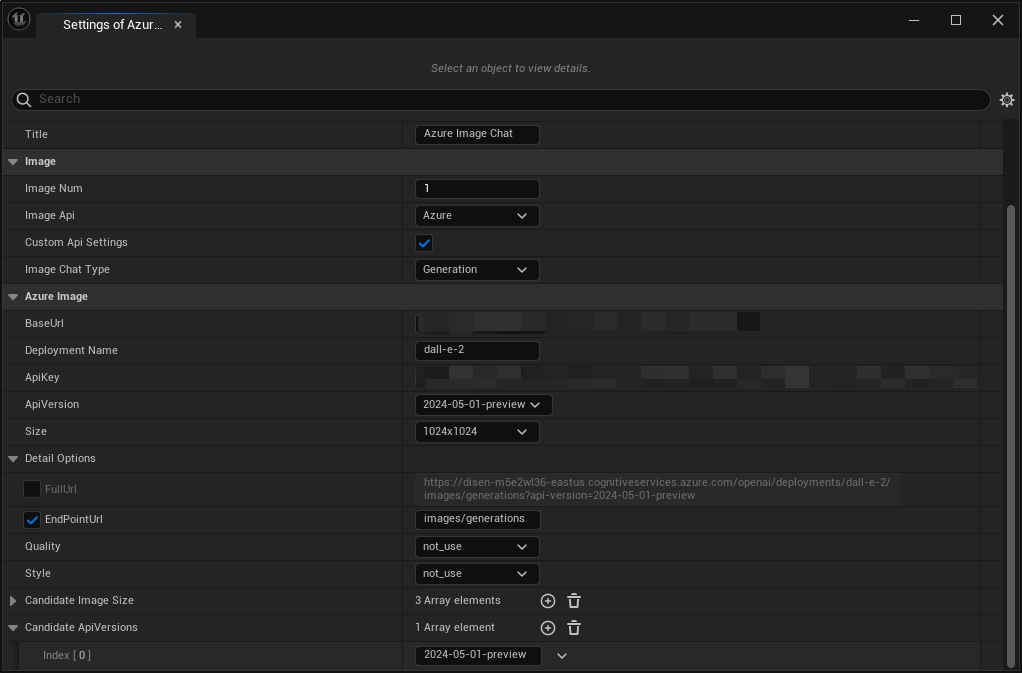
Start chatting, let Azure create an image.
The editor uses Claude to chat and analyze images.
Create a new chat session, rename ChatApi to Claude, and configure Claude's API parameters.
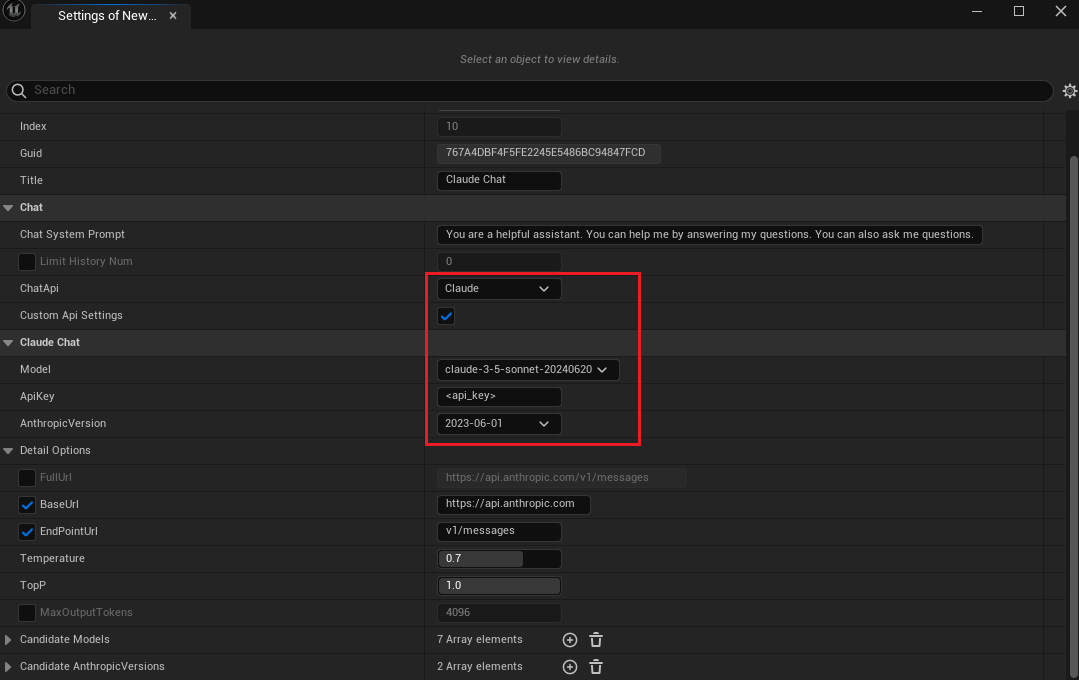
Start chatting.
The editor uses Ollama for chatting and analyzing images.
Create a new chat session, change ChatApi to Ollama, and configure Ollama's API parameters. If it's a text chat, set the model to a text model like llama3.1; if image processing is needed, set the model to a vision-enabled model like moondream.
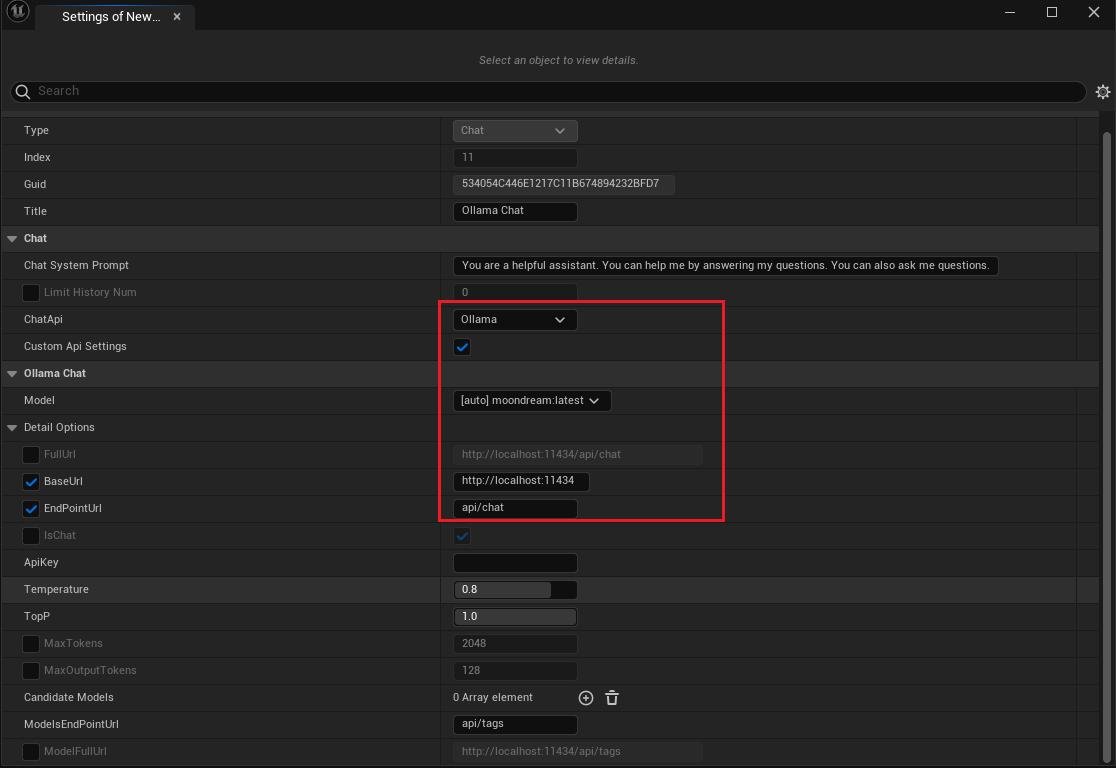
Start chatting
Editor using Gemini
Create a new conversation (New Chat), change ChatApi to Gemini, and configure Gemini's API parameters.
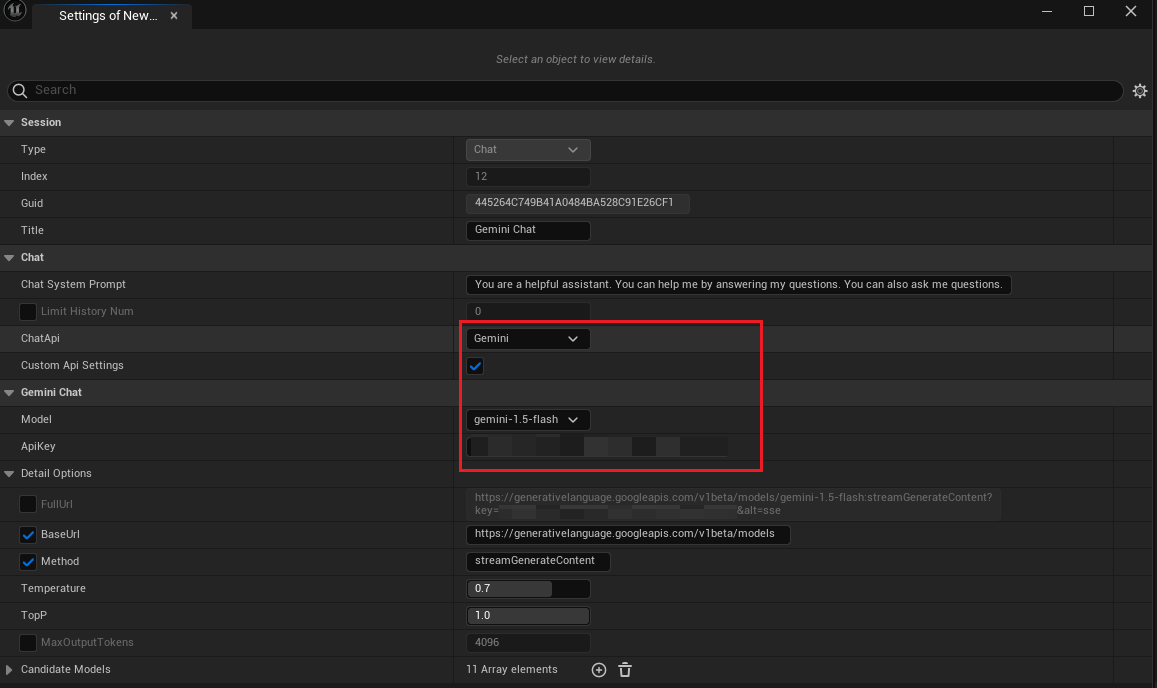
Start chatting.
The editor uses Gemini to send audio.
Select to read audio from file / read audio from asset / record audio from microphone, generate the audio to be sent.
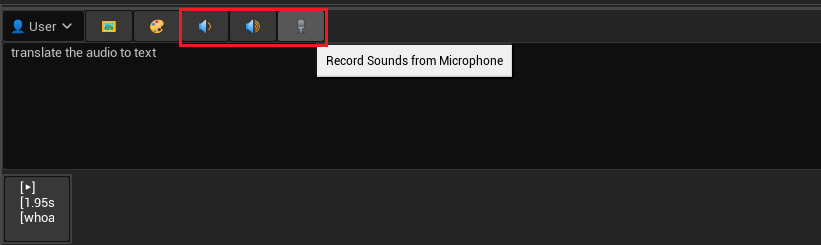
Start chatting.

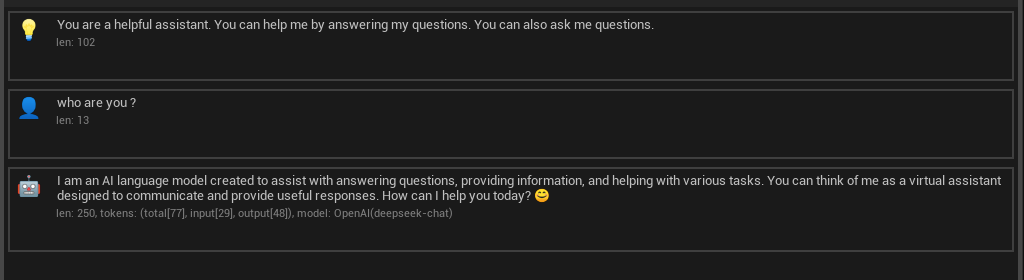
The editor uses Deepseek.
Create a new chat session, change ChatApi to OpenAi, and configure the API parameters of Deepseek. Add a new candidate model named deepseek-chat, and set the model as deepseek-chat.
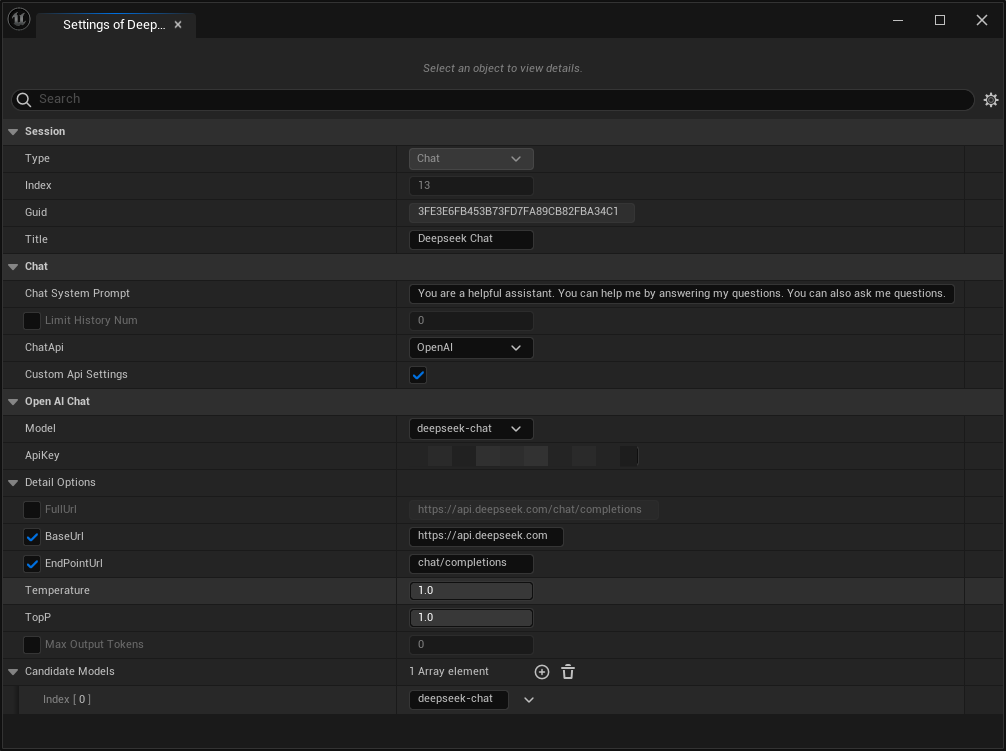
Start chatting.
Original: https://wiki.disenone.site/en
This post is protected by CC BY-NC-SA 4.0 agreement, should be reproduced with attribution.
Visitors. Total Visits. Page Visits.
This post has been translated using ChatGPT. Please provide feedback in FeedbackPoint out any omissions.