剛接觸Unity沒多久,對Unity的ShaderLab一直很感興趣,感覺它可以快速地實現各種各樣的顯示效果,很有趣。嘛,作為一個門都還沒入的人,我就來搞一搞深度圖和邊緣檢測吧。
小地圖設置
因為我只是做了一個小雛形,所以我不打算詳細地講怎麼在場景上畫小地圖,大致上說我做了以下一些事情:
獲取場景的bounding box,這在設定相機的參數和位置時很有用。 將小地圖相機配置為正交投影,根據 bounding box 設置相機的近平面和遠平面。 為這台相機新增一個人物目標,目標會顯示在地圖的中心。 每次更新相機位置時,依據目標位置及場景的最大 y 值。
具體的配置可以參考後面給出的程式碼。
獲取深度圖
depthTextureMode 用來獲取深度圖
相機自己可以保存DepthBuffer或者一個DepthNormalBuffer(可用來做邊緣檢測),只需要設置。
然後在Shader裡面引用
就可以了,具體的做法可以參考我後面給出的代碼。關於在Z-Buffer裡面保存的深度值跟真實世界的深度的關係可以參考這兩篇文章:
Learning to Love your Z-buffer,Linearize depth另外 Unity 也提供了一些函數來計算深度: Linear01Depth, LinearEyeDepth 等。
這不是我要著重討論的重點,我想講的是,原本我的相機設定是正交投影,深度應該是線性的,但我測試出來卻不是線性。然後我用上面連結介紹的方法來計算真實世界的深度,也一直都不正確,以至於一直計算不出真正的線性深度,不知道是Unity的Z_Buffer的問題還是什麼,那位朋友知道的請教教我。當然,如果不需要真實的深度值,單單是比較深度的大小之類的,用上面的方法就足夠了,而且很簡單。但是對於我來說,我想把真實深度映射為顏色值,需要獲得真實的線性的深度值(雖然也是[0, 1]),我只好用另外一種用 RenderWithShader 方法了。
使用 RenderWithShader 方法来取得深度圖。
這種方法其實就是用Unity Reference裡面的一個例子:Rendering with Replaced Shaders需要理解的是,RenderWithShader會把場景中的相應的Mesh畫一遍。
建立一個 Shader:
Shader "Custom/DepthByReplaceShader"
{
SubShader
{
    Tags { "RenderType"="Opaque" }
    Pass {
        Fog { Mode Off }
        CGPROGRAM
        #pragma vertex vert
        #pragma fragment frag
        #include "UnityCG.cginc"

        struct v2f {
            float4 pos : SV_POSITION;
            float2 depth : TEXCOORD0;
        };

        v2f vert (appdata_base v) {
            v2f o;
            o.pos = mul (UNITY_MATRIX_MVP, v.vertex);
            UNITY_TRANSFER_DEPTH(o.depth);
            return o;
        }

        float4 frag(v2f i) : COLOR {
            //UNITY_OUTPUT_DEPTH(i.depth);
            float d = i.depth.x/i.depth.y;
            return float4(d, d, d, 1);
        }
        ENDCG
    }
}
}
為您的小地圖相機(如果尚未建立)添加一個腳本,將相機配置為正交投影等,並在 Update() 中使用此着色器來渲染場景:
渲染的結果將保存在 depthTexture 裏面,相當簡單吧。
將深度映射為顏色
要完成這項工作,首先需要一張顏色圖,這張圖可以用 Matlab 很簡單地生成,例如我用的是 Matlab 裡面的 jet 圖:
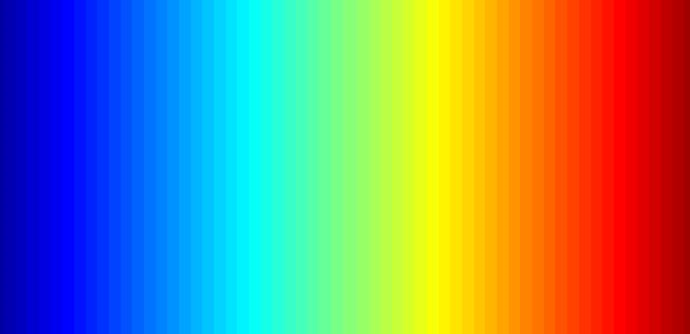
將這張圖片放入專案目錄 Assets\Resources 中,便能在程式中讀取該圖片:
需要注意的是,這張圖片的 Wrap Mode 應該是 Clamp,防止在兩邊緣的顏色值之間進行插值。
接下來需要使用 OnRenderImage 和 Graphics.Blit 函數,函數的原型為:
void OnRenderImage(RenderTexture src, RenderTexture dst);
static void Blit(Texture source, RenderTexture dest, Material mat, int pass = -1);
這個函數的 src 是相機渲染的結果,dst 是處理後傳回給相機的結果,因此這個函數通常是用來在相機渲染完成後做圖片的一些效果,例如我們這裡對深度做顏色映射,還有邊緣檢測。做法就是在OnRenderImage中調用Graphics.Blit,傳入特定的Material:
需要注意的是,Graphics.Blit實際上做了這樣一件事情:在相機前面畫一個跟螢幕大小一樣的平面,把src作為這個平面的_MainTex傳進Shader中,然後把結果放到dst裡面,而不是把實際場景中的Mesh重新畫一遍。
將這些文字翻譯成繁體中文:
對顏色映射其實就是把深度 [0, 1] 看成圖片的 uv,因為我想距離相機近的為紅色,所以我對深度取了反:
邊緣檢測
邊緣偵測需要使用相機本身的 '_CameraDepthNormalsTexture',主要是使用法向的值,深度則使用之前計算出來的。在 '_CameraDepthNormalsTexture' 的每個像素 (x, y, z, w) 中,(x, y) 是法向,(z, w) 是深度。法向是以一種特定方法儲存的,若有興趣可以自行搜尋。
代碼參考了 Unity 內建的影像效果中的邊緣檢測,所需做的事情就是比較當前像素的法向深度與鄰近像素的差異,若足夠大,我們便認為存在邊緣:
inline half CheckSame (half2 centerNormal, half2 sampleNormal, float centerDepth, float sampleDepth)
{
    // difference in normals
    // do not bother decoding normals - there's no need here
    half2 diff = abs(centerNormal - sampleNormal);
    half isSameNormal = (diff.x + diff.y) < 0.5;

    // difference in depth
    float zdiff = abs(centerDepth-sampleDepth);
    // scale the required threshold by the distance
    half isSameDepth = (zdiff < 0.09 * centerDepth) || (centerDepth < 0.1);

    // return:
    // 1 - if normals and depth are similar enough
    // 0 - otherwise
    return isSameNormal * isSameDepth;
}
下列是完整的 Shader:
Shader "Custom/DepthColorEdge" {

Properties
{
    _DepthTex ("Depth Tex", 2D) = "white" {}
    _ColorMap ("Color Map", 2D) = "white" {}
}
    SubShader
    {
        Tags { "RenderType"="Opaque" }
        LOD 200
        Pass
        {
            ZTest Always Cull Off ZWrite Off
            Fog { Mode off }
            CGPROGRAM
            #pragma vertex vert
            #pragma fragment frag
            #include "UnityCG.cginc"
            sampler2D _CameraDepthNormalsTexture;
            sampler2D _DepthTex;
            uniform float4 _DepthTex_TexelSize;
            sampler2D _ColorMap;
            float _ZNear;
            float _ZFar;

            struct v2f
            {
                float4 pos : SV_POSITION;
                float2 uv[3] : TEXCOORD0;
            };

            v2f vert (appdata_base v)
            {
                v2f o;
                o.pos = mul (UNITY_MATRIX_MVP, v.vertex);
                o.uv[0] = MultiplyUV( UNITY_MATRIX_TEXTURE0, v.texcoord );
                o.uv[1] = o.uv[0] + float2(-_DepthTex_TexelSize.x, -_DepthTex_TexelSize.y);
                o.uv[2] = o.uv[0] + float2(+_DepthTex_TexelSize.x, -_DepthTex_TexelSize.y);
                return o;
            }


            inline half CheckSame (half2 centerNormal, half2 sampleNormal, float centerDepth, float sampleDepth)
            {
                // difference in normals
                // do not bother decoding normals - there's no need here
                half2 diff = abs(centerNormal - sampleNormal);
                half isSameNormal = (diff.x + diff.y) < 0.5;

                // difference in depth
                float zdiff = abs(centerDepth-sampleDepth);
                // scale the required threshold by the distance
                half isSameDepth = (zdiff < 0.09 * centerDepth) || (centerDepth < 0.1);

                // return:
                // 1 - if normals and depth are similar enough
                // 0 - otherwise
                return isSameNormal * isSameDepth;
            }

            half4 frag(v2f i) : COLOR
            {
                // get color based on depth
                float depth = tex2D (_DepthTex, i.uv[0]).r;
                half4 color = tex2D(_ColorMap, float2(saturate(1-depth), 0.5));

                // detect normal diff
                half2 centerNormal = tex2D(_CameraDepthNormalsTexture, i.uv[0]).xy;
                half2 sampleNormal1 = tex2D (_CameraDepthNormalsTexture, i.uv[1]).xy;
                half2 sampleNormal2 = tex2D (_CameraDepthNormalsTexture, i.uv[2]).xy;
                float sampleDepth1 = tex2D (_DepthTex, i.uv[1]).r;
                float sampleDepth2 = tex2D (_DepthTex, i.uv[2]).r;
                color *= CheckSame(centerNormal, sampleNormal1, depth, sampleDepth1);
                color *= CheckSame(centerNormal, sampleNormal2, depth, sampleDepth2);

                return color;
            }
            ENDCG
        }

    }
    FallBack "Diffuse"
}
類似於這個結果:

混合真實世界圖像
單單是深度的顏色圖可能有點無聊,那麼我們可以混合上真實場景的顏色圖,只需要再建立一個 Shader,傳入前面的圖像和相機的真實圖像,在 OnRenderImage 中進行混合:
Shader "Custom/ColorMixDepth" {
    Properties {
        _MainTex ("Base (RGBA)", 2D) = "white" {}
        _DepthTex ("Depth (RGBA)", 2D) = "white" {}
    }
    SubShader {
        Tags { "RenderType"="Opaque" }
        LOD 200

        CGPROGRAM
        #pragma surface surf Lambert

        sampler2D _MainTex;
        sampler2D _DepthTex;

        struct Input {
            float2 uv_MainTex;
            float2 uv_DepthTex;
        };

        void surf (Input IN, inout SurfaceOutput o) {
            half4 c = tex2D (_MainTex, IN.uv_MainTex);
            half4 d = tex2D (_DepthTex, IN.uv_DepthTex);
            //d = d.x == 1? 0 : d;
            o.Albedo = c.rgb*0.1 + d.rgb*0.9;
            o.Alpha = 1;
        }
        ENDCG
    }
    FallBack "Diffuse"
}
void OnRenderImage(RenderTexture src, RenderTexture dst)
{
    // if now rendering depth map
    if (isRenderDepth)
    {
        depthEdgeMaterial.SetTexture("_DepthTex", src);
        if(isUseColorMap)
            Graphics.Blit(src, dst, depthEdgeMaterial);
        else
            Graphics.Blit(src, dst);
        return;
    }
    // else rendering real color scene, mix the real color with depth map
    else
    {
        mixMaterial.SetTexture("_MainTex", src);
        mixMaterial.SetTexture("_DepthTex", depthTexture);
        Graphics.Blit(src, dst, mixMaterial);
        ReleaseTexture();
    }
}
RenderWithShader 時,也會觸發 OnRenderImage,換言之,此函數將被呼叫兩次。然而,這兩次呼叫所需完成的功能各有不同,因此我在此使用一個變數來指示當前的渲染狀態,是在製作深度圖還是混合。
完整的代碼
代碼文件有點多,就放到這裡了depth-minimap抱歉,請提供更多文字以便我進行翻譯。
Original: https://wiki.disenone.site/tc
This post is protected by CC BY-NC-SA 4.0 agreement, should be reproduced with attribution.
Visitors. Total Visits. Page Visits.
此帖子是使用 ChatGPT 翻譯的,請在反饋指出任何遺漏之處。